


Photography Tips for Portrait Photographers!
Do you want to know how to get a blurry background in your photos? You can do it! Keep reading to learn 4 simple steps to achieving this effect. You’ll see that once you take the time to set your photo up correctly using these techniques, you’ll be able to get blurry backgrounds all the time!
Related PODCAST: Listen to the Stay Focused Podcast and Learn How To Master Getting A Blurry Background
Focal Length
The longer your focal length, the more blur you can achieve in your photos. If you are using a 85mm or longer, it is easier to achieve the look you want. I almost always use a 135mm lens. This alone is not the only thing that will create a beautiful blurry background. BUT, you can still get blurry backgrounds using a 50mm or 35mm, if you do the next few things!
Related Article: Why The 135mm Should Be On Your Wishlist!
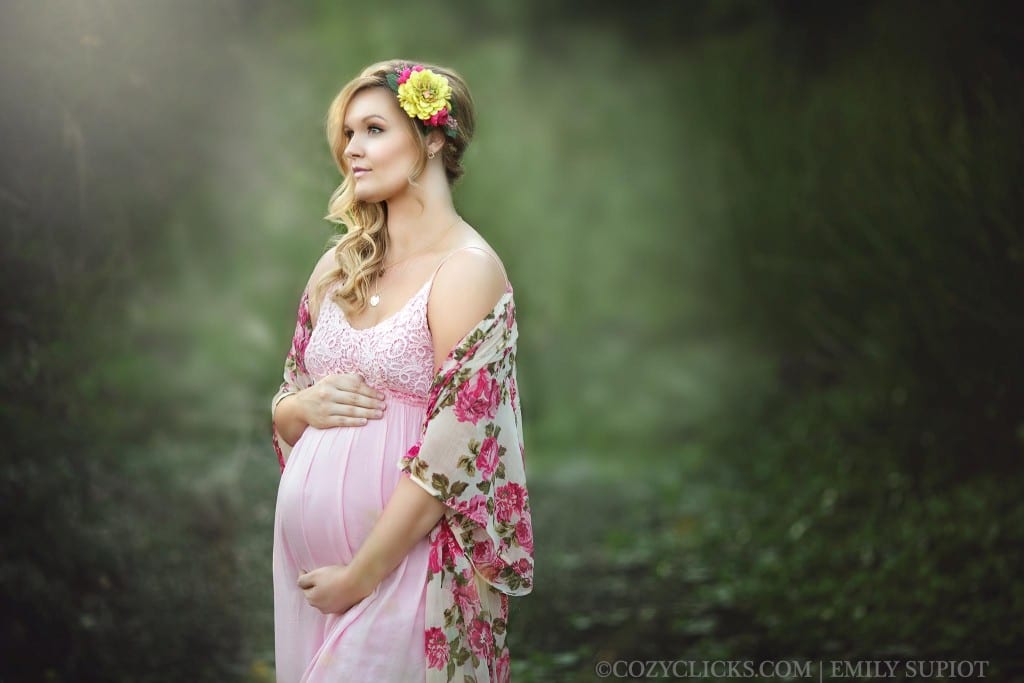
(Both photos above taken with a Canon 5d mark ii & 135mm)
Aperture
Set it wide. By opening up your aperture you are setting your photo up for getting great blur in the background. The wider open you are, the better chance you have the create this effect. A wide aperture setting is typically between f/ 1.2 – f/3.5. However, blurry backgrounds can be created with narrower apertures, if you follow some of the other tips.
Related Article: The 4 Step System For Shooting In Manual Mode
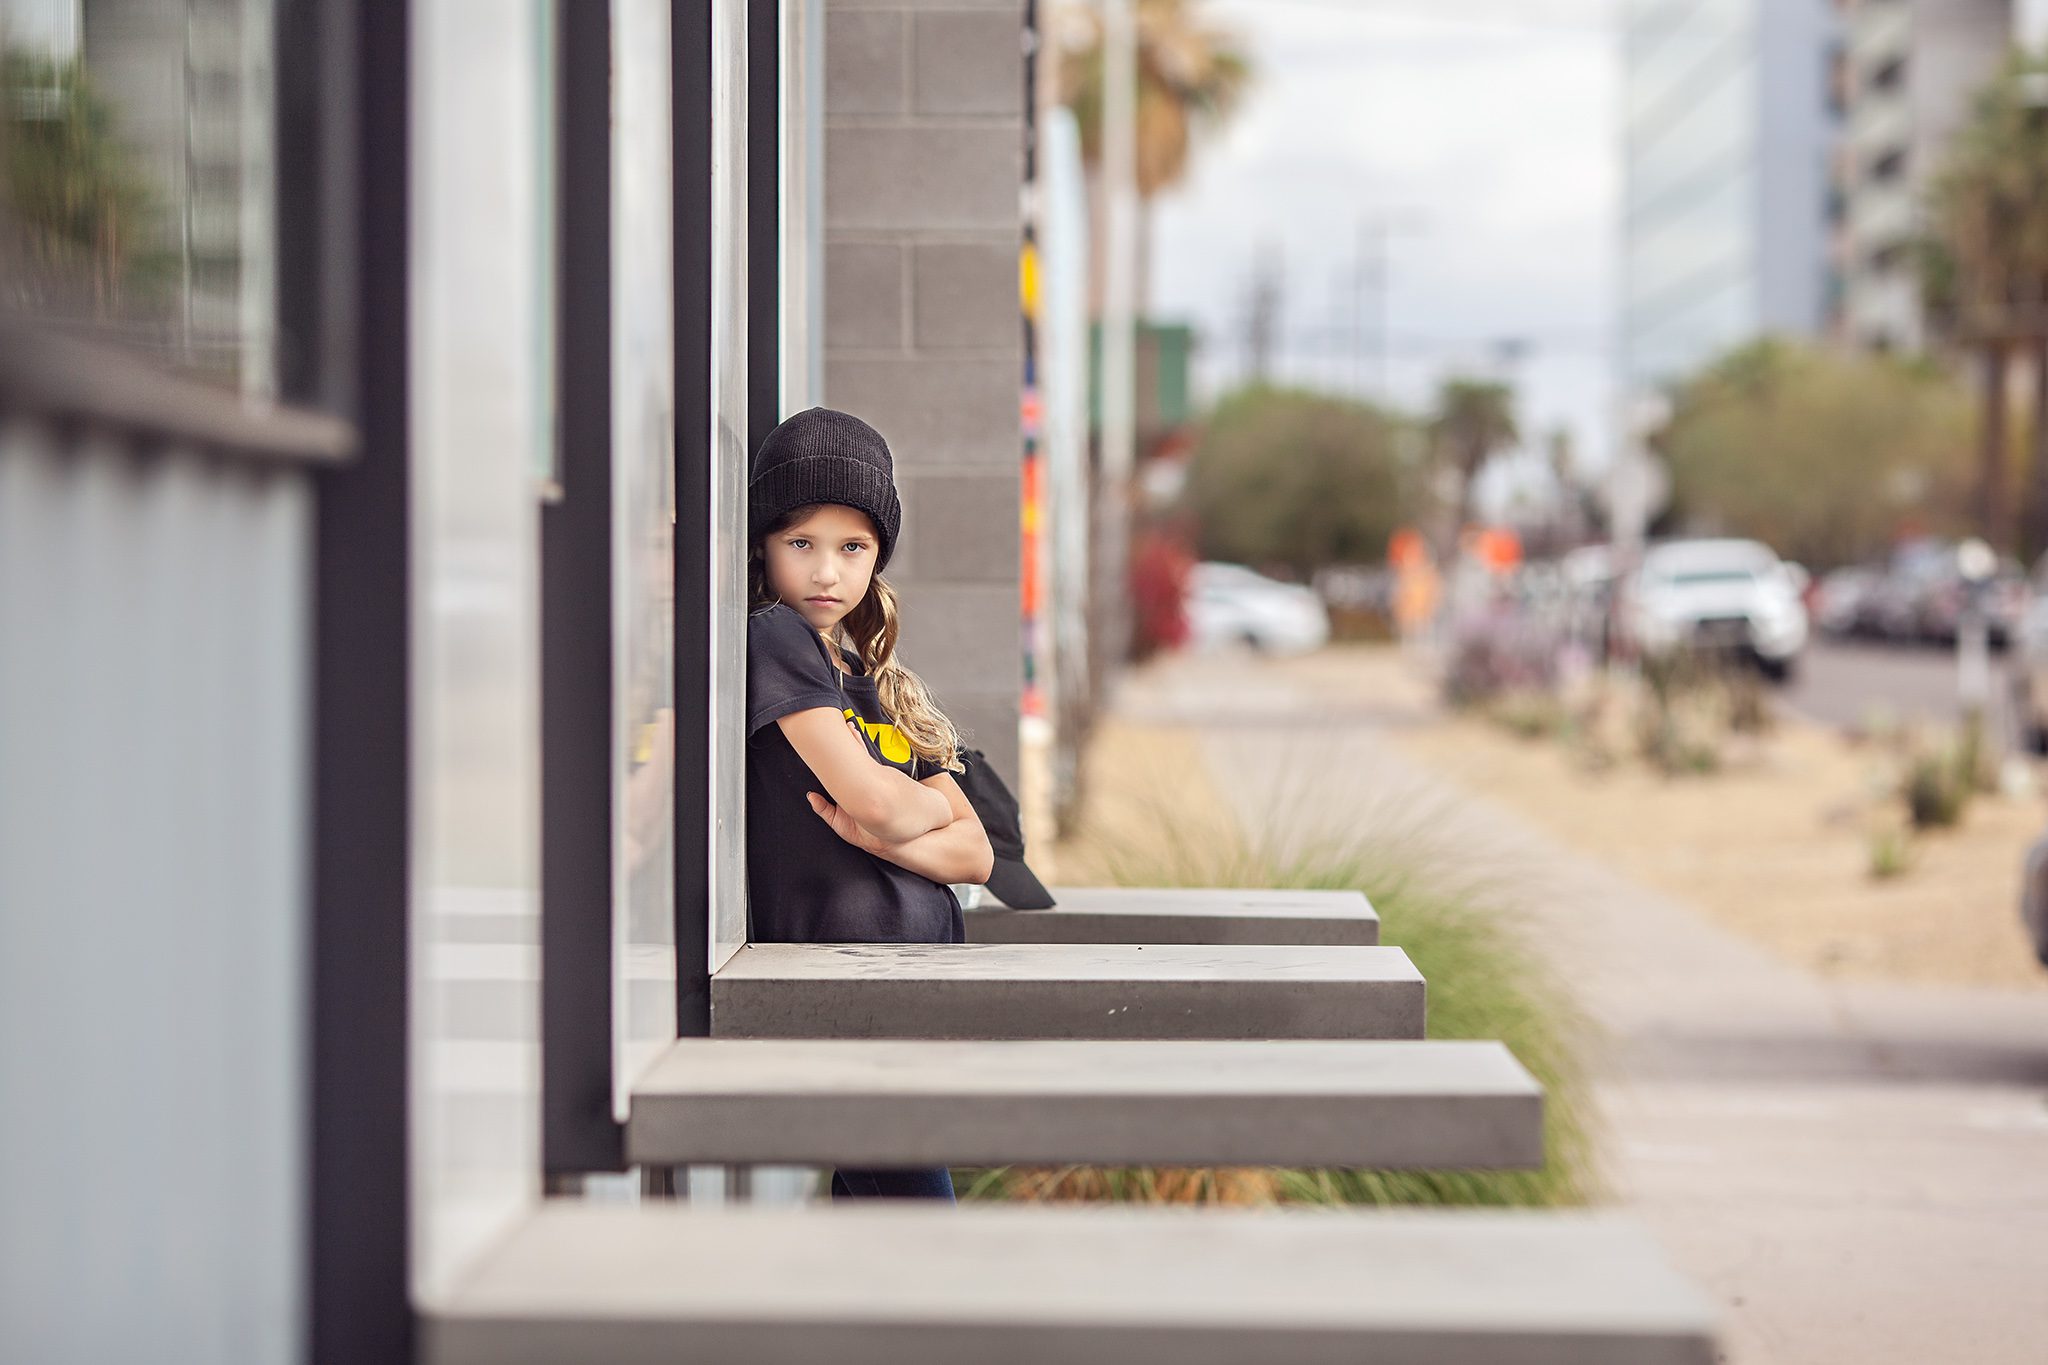
Position
If you want the blurry backgrounds in your photos, you must position your subject away from the background. The farther the subject is from the background, the blurrier it will become. If your subject has their back touching a wall or tree, that background will not get the blurriness you desire. Have your subject step (far) away from whatever is behind them.
Add It In
To really give your photo some creative flair, or if you just didn’t achieve the level of blurriness you wanted. you could always add some in later in Photoshop. Now, this won’t work with every photo. But, if you have one that already had a slight level of blur to it, there are ways in Photoshop you can add extra in. Watch below and I’ll take you step by step how I add extra blur to the background in my photos.
Thanks for reading! I hope this helps you achieve the look you were hoping for. Did this help you? I’d love to know! Come follow me over on Instagram and leave me a DM or comment on any of my pictures to let me know you were here!


I truly appreciate your wonderful posts. I have only viewed a few posts so far, and yet have learned so much! Please know how much I appreciate your lessons!!
Thank you so much Beverly! I appreciate you taking the time to reach out and let me know! -Emily
What photoshop app do you use or can you recommend some good ones???
Hi Stacey! Sure! Here are my recommendations: http://cozyclicks.com/what-editing-program-should-i-use-5-great-choices-for-photographers-the-friday-five/
Hi Emily,
Thanks again for all you do! I’m new at photoshop and maybe my hardware and software is not most up to date, but when following your steps to blur the background, I get this message “Could not complete the Gaussian Blur command because there’s not enough memorie (RAM)”. Do you happen to know why and how to fix this error? Thanks again, Emily!
Hey Daniela!
You are so welcome! it sounds like you are going to need to free up some space on your computer. Delete some of the programs or files you aren’t using to get yourself some more memory back:) Emily
Thank you for the video tutorial. I was wasting time using the blur tool and still not getting the effect I wanted. Now I know the proper way to blur the background. Thank you!
You are so welcome Janelle! -Emily
Beautiful edit. I love all of your tutorials. Thank you for sharing! My question is, how do you remove the ‘halo’ that’s around him, after you’ve erased the unwanted blur over his face/head?
Hi Eva!
Generally I edit a lot more slowly and carefully then I do in the videos. I use a smaller brush around the face and hair to try to eliminate any haloing effect. Also, this works best if the background is already somewhat blurred. If it wasn’t, you could draw around the subject with the pen tool, make a selection and then apply blur. Hope that helps!
Emily
Hey, Emily! I was wondering what editing software you use? Also what camera to do recommend someone who wants to get started in photography?
Hi Sydney!
Thanks for asking:) I usually use ACR and then bring into Photoshop. Occasionally Lightroom. I think a great beginner camera is the Canon T6. That is the newest model, but I started using two of the earlier models and really liked it! Good luck:)
Emily
Hi again Emily.
Great advice, I am getting the blurry backrounds but I would love to know how you paint in those dreamy colors, it makes your subject stand out from the background? I can’t master this. Is there a special brush? Any advice would help, or maybe a tutorial you have posted before?
Thanks for sharing!
Hey Tina! There’s actually a few different things I do for color. I wrote in article here on Digital Photography School awhile back on what I do before hand to get colors to really pop. No special brush, but I do use a few Photoshop tools as well on occasion to boost/change the colors- I’ll put it on my calendar to write an article later this month on a few of the ways I do it:) Emily