How to Easily Add Snow to Your Photos in Photoshop + Free Overlays!
Are you looking to add some snow to your photos? Maybe you live in an area like me, where you just don’t get snow. Or you just want to put a creative spin on one of your photos. Either way, look no further! I’m going to show you how to add snow to your photos in Photoshop using the FREE Cozy Clicks snow overlays +how to winterize with the mini winter action bundle. (make sure to scroll to the bottom to download your free pack!) Let’s learn how to how to add snow to your photos in Photoshop!
First
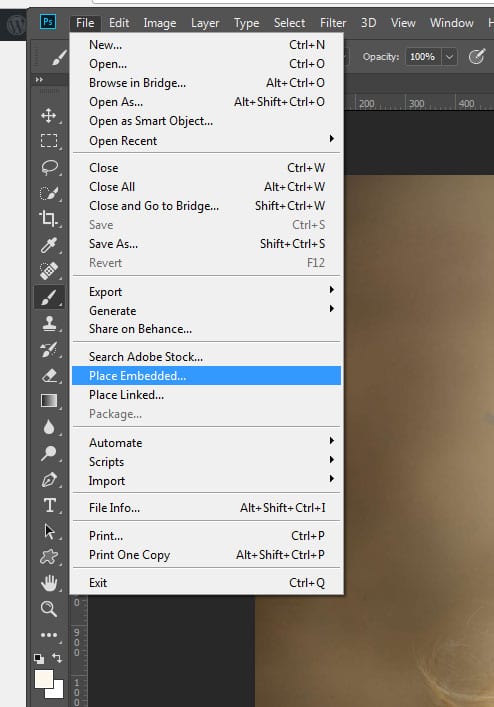
Open your photo up in Photoshop.
Then
You’ll want to place one (or both) of the overlays on top of you photo by going to File>Place embedded and then select one of the snow overlays.
(*HINT* You can also go to File>open to open you overlay and then with the move tool, drag it on top of your image)
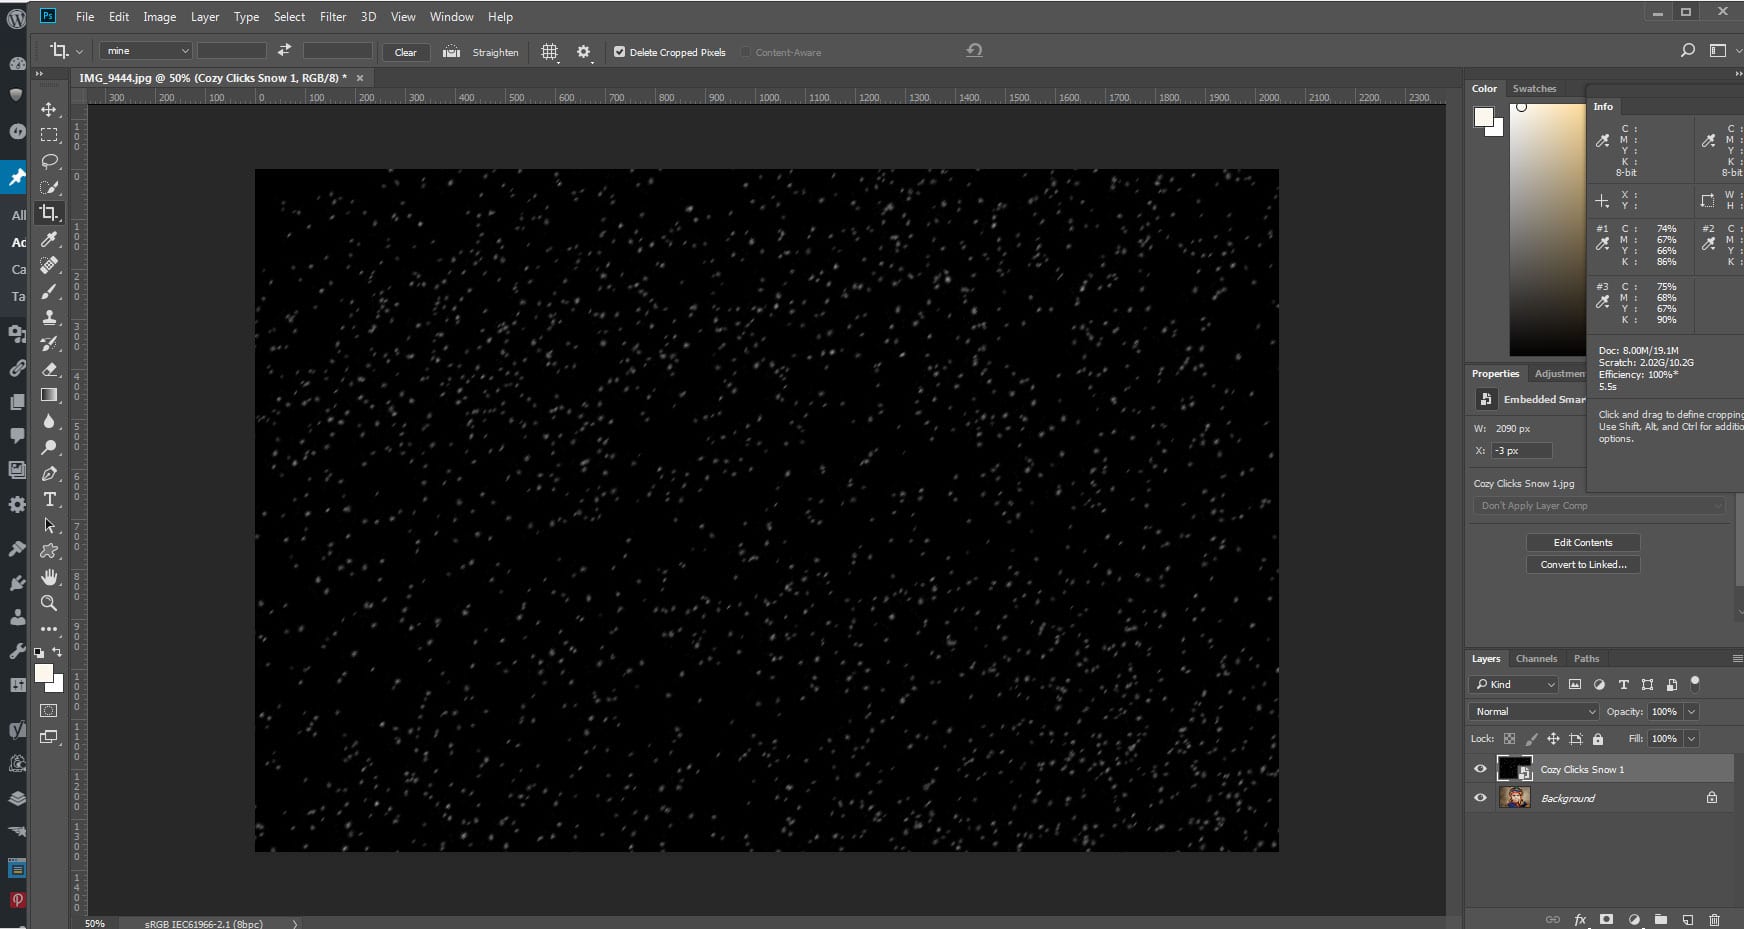
Your photo will now look something like this. *Note* If the overlay is smaller or larger than your photo. Simply choose Edit>Free transform to adjust the size.
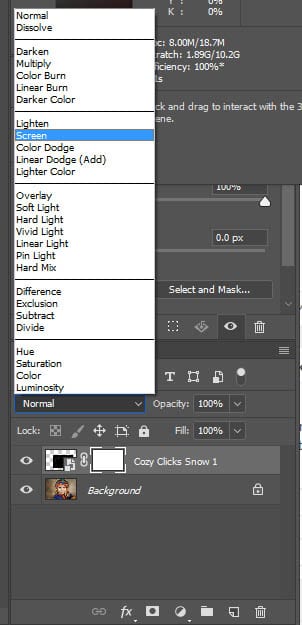
This doesn’t look that great, right? But we can easily fix that by changing the blending mode. With the overlay layer selected, change the bending mode to “screen” and presto! Your photo now has snow.
RELATED ARTICLE: Blending Modes Explained
RELATED PRODUCT: Winter Inspired Photoshop Actions From Cozy Clicks
Â
To eliminate part or all of the snow from your subject, create a layer mask and with a soft black brush, brush off your subject.
And there you have it! To watch me add snow in action (And see how to use the freebie winter actions) watch the quick video tutorial below!
Have fun, enjoy and don’t get too cold in the snow:)


Â