
How To Get your Subject To POP From the Background In Photoshop
In this week’s editing tip Tuesday, you’re going to learn one really quick way to get your subject to pop from the background using Photoshop!
Â
How To Get your Subject To POP!
Select Your Photo
This technique won’t work great on all photos. You’re going to want to find one where there isn’t a lot going on in the background to begin with. Plain backgrounds work best. This technique works very well when the subject shares many of the same colors as the background and just need that extra little pop! Once you’ve got the photo you’d like to work on, open it up in Photoshop.

(Here, I choose a photo because the tones in the background and her clothing/hair are very similar)
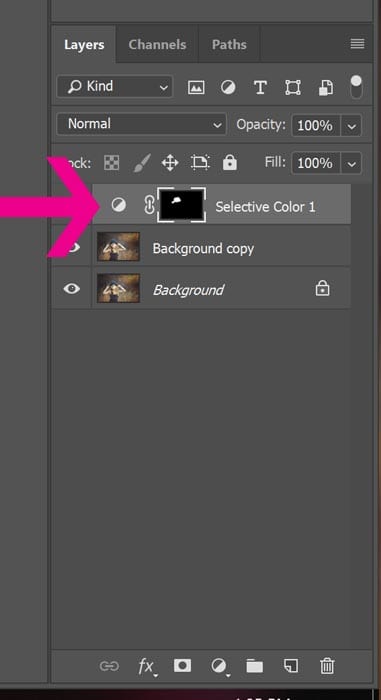
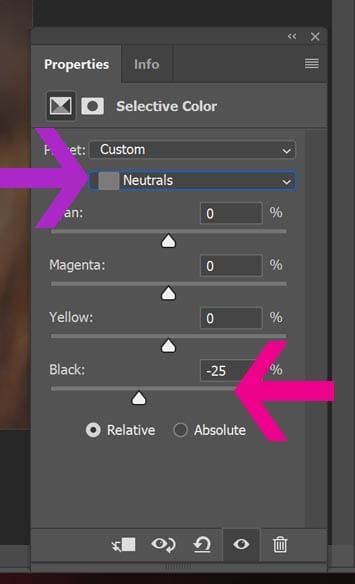
Create A Selective Color Layer
In your adjustment layer panel create a selective color layer. From there select neutrals” from the drop down color menus. Drag the black slider to the left. Invert that layer by pressing cntl+I (or cmd +I on a MAC)
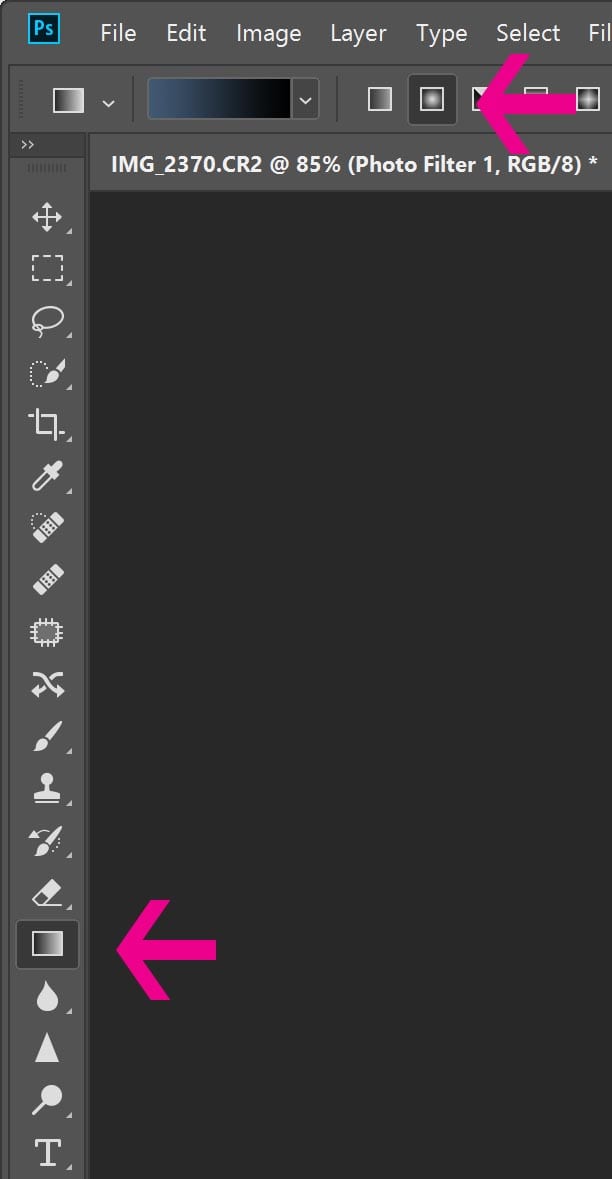
Select the Gradient Tool
Select the gradient tool on the left side toolbar. On the top toolbar make sure radial gradient is selected. Place to cursor on the subject or just slightly to the side and pull out.
Erase Off Your Subject
Some of that de-saturated gradient with appear on your subject. To remove it, just use a black brush and brush it off your subject. And presto! You’re done! The subject should appear more separated from the background and POP out!

 (Notice the slight change. YOU have control over exactly how much to change it! Just lower the blacks even greater in that selective color layer for more dramatic change!)
‘
Are you over on Instagram? Me too! I love seeing your results from any of my tutorials! If you happen to post a pic over on Instagram where you used this (or any) of the Cozy Clicks tutorials make sure to mention or tag me (@cozyclicks) So I can see your results!

Â
Â
Â