Â
Ever wonder how to get your image looking just a bit more sharp or maybe how to fix a photo that was slightly out of focus? Philip Hegel with Philip Hegel Photography shows you how today on Editing Tip Tuesday! A new feature to the Cozy Clicks blog, where photographers like you share their best editing secrets!Â
Â
One of the biggest things I learned a long time ago was how every digital photo always needs sharpening because it is just a limitation of digital photography compared to film. This is why Lightroom starts every photo with sharpening set to 40 under the details tab, it is just necessary to bump up that level of contrast between pixel edges to refine the image. Sometimes I find that Lightroom isn’t doing it for me, and most of my presets actually have the sharpening function turned down low because I would rather use a High Pass Filter in Photoshop. I have also used this process very carefully in the past to rescue that one photo from the proofs that mom HAD to pick where someone was out of focus a little bit (despite all the others being just fine, lol), but this is NOT a replacement for getting the photo right in camera, just a good tool in an emergency.
Â
For Overall Sharpening
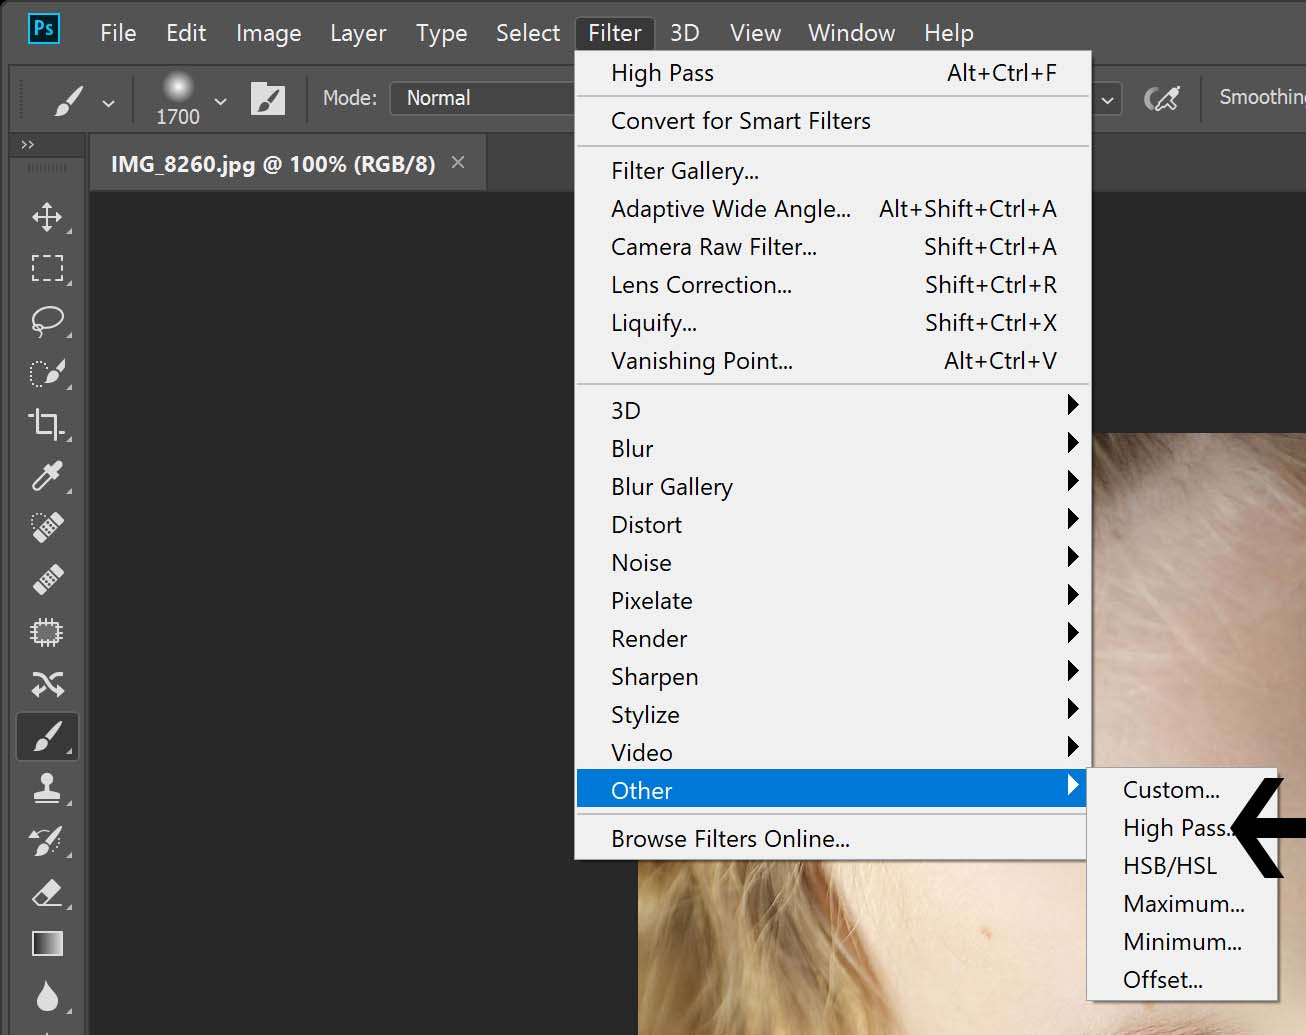
To use this function for overall sharpening, wait until ALL other edits are completed and this is the final step. Then, simply create a new layer with command or ctrl + j. Once you are on the new layer go to your filter menu and choose Filter>Other>High Pass.
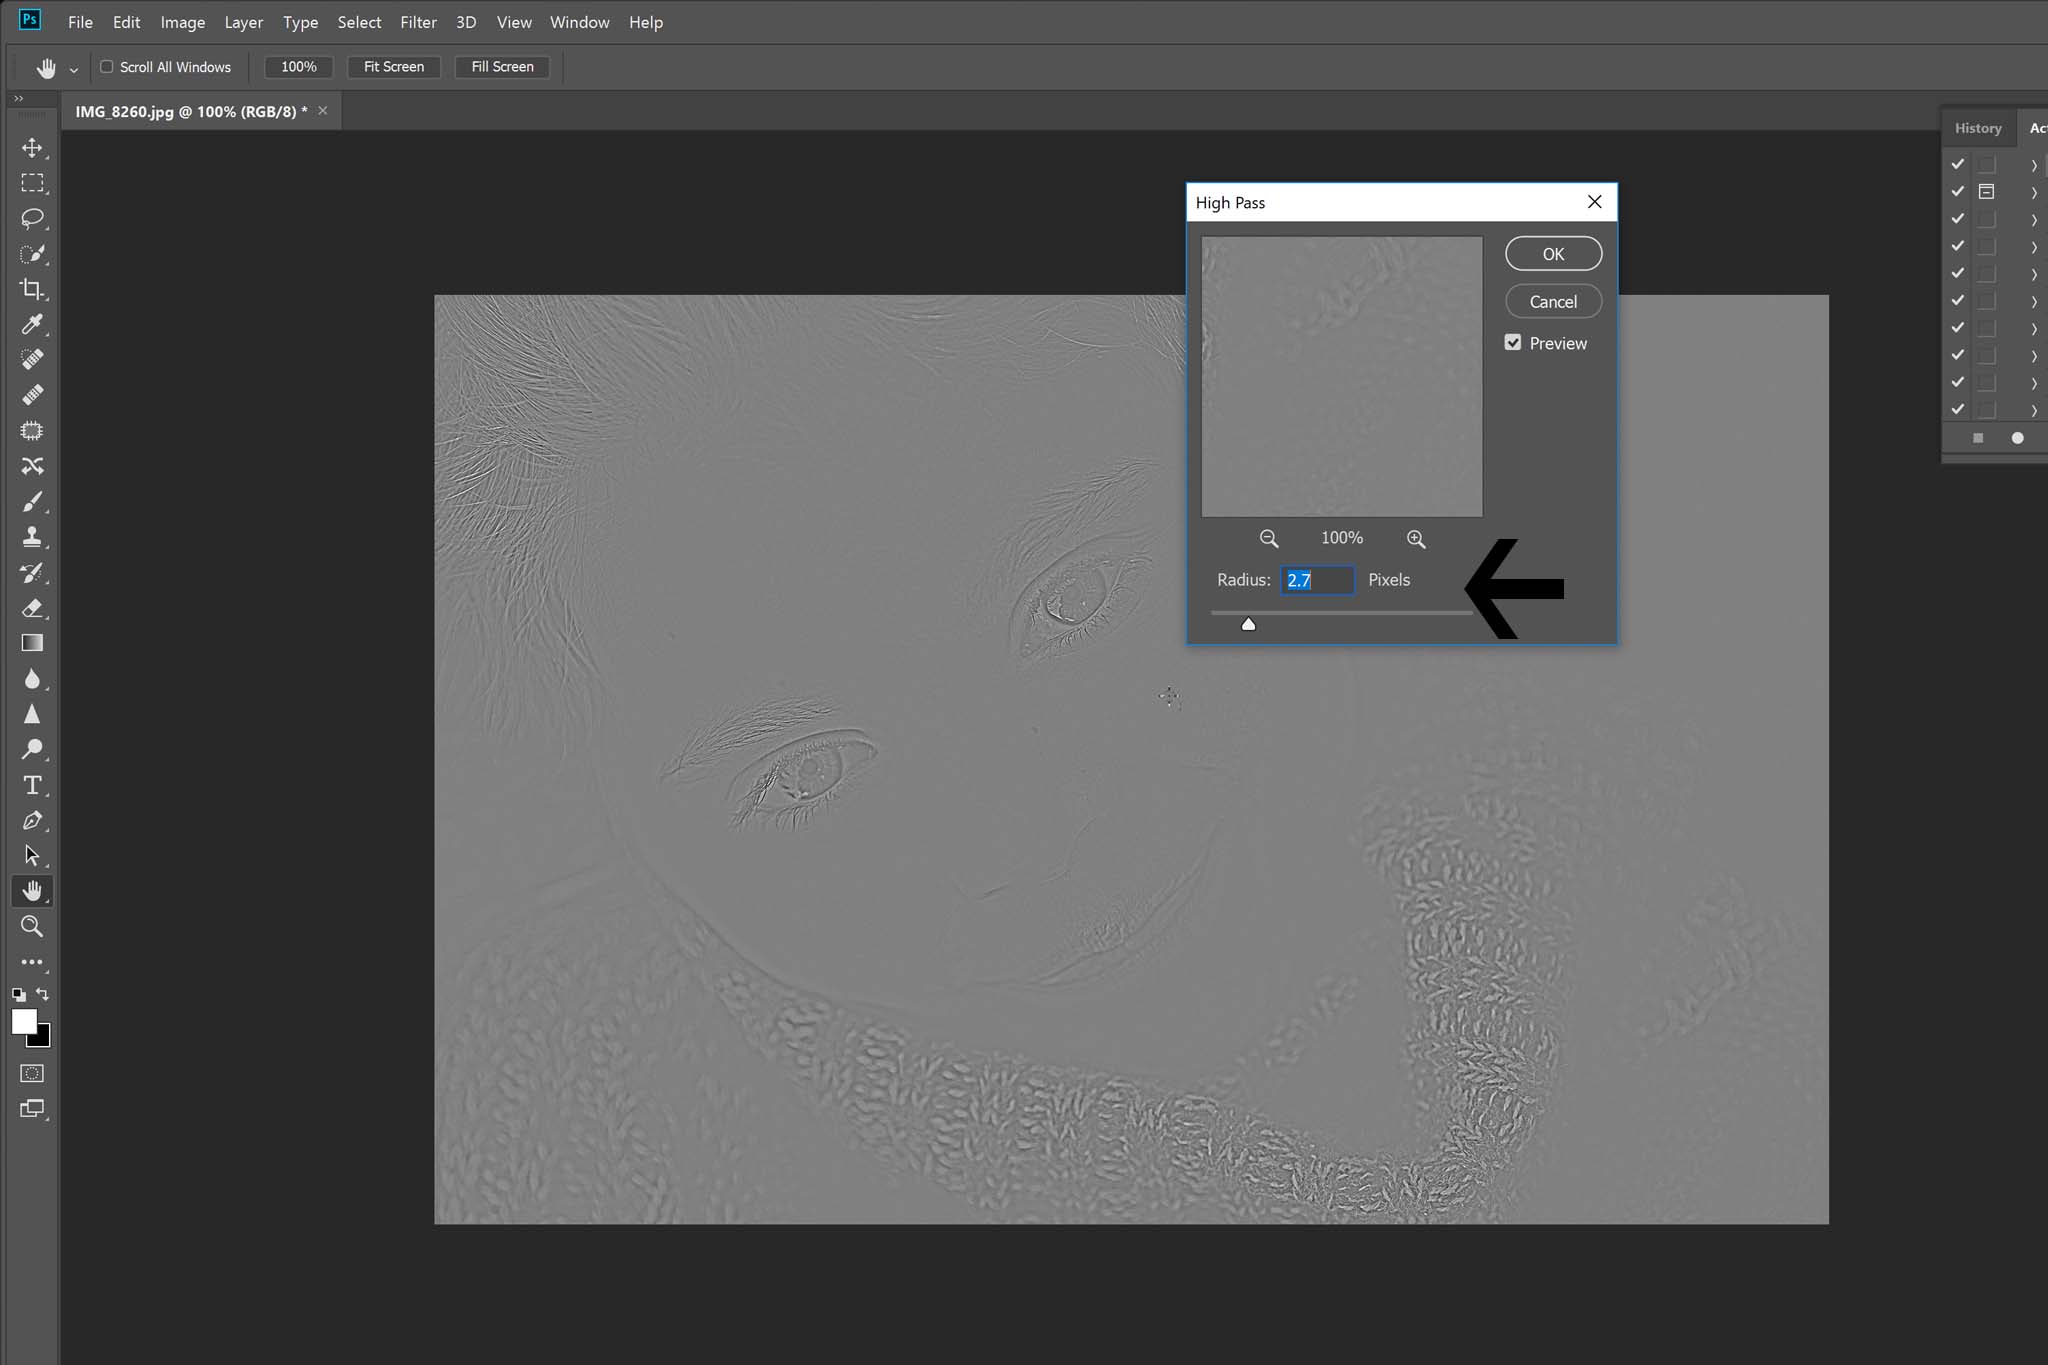
 Your image is going to go all gray, that is supposed to happen, it will come back! A popup appears where you set your parameters. The only thing you need to choose is the pixel radius (for ease just think of this number as the higher it gets the stronger the effect gets). Start small, around 1 to 2.5 pixels. You want to adjust that number in small .5 pixel amounts until you can just start to see the details you want to sharpen underneath the gray mask on the photo.
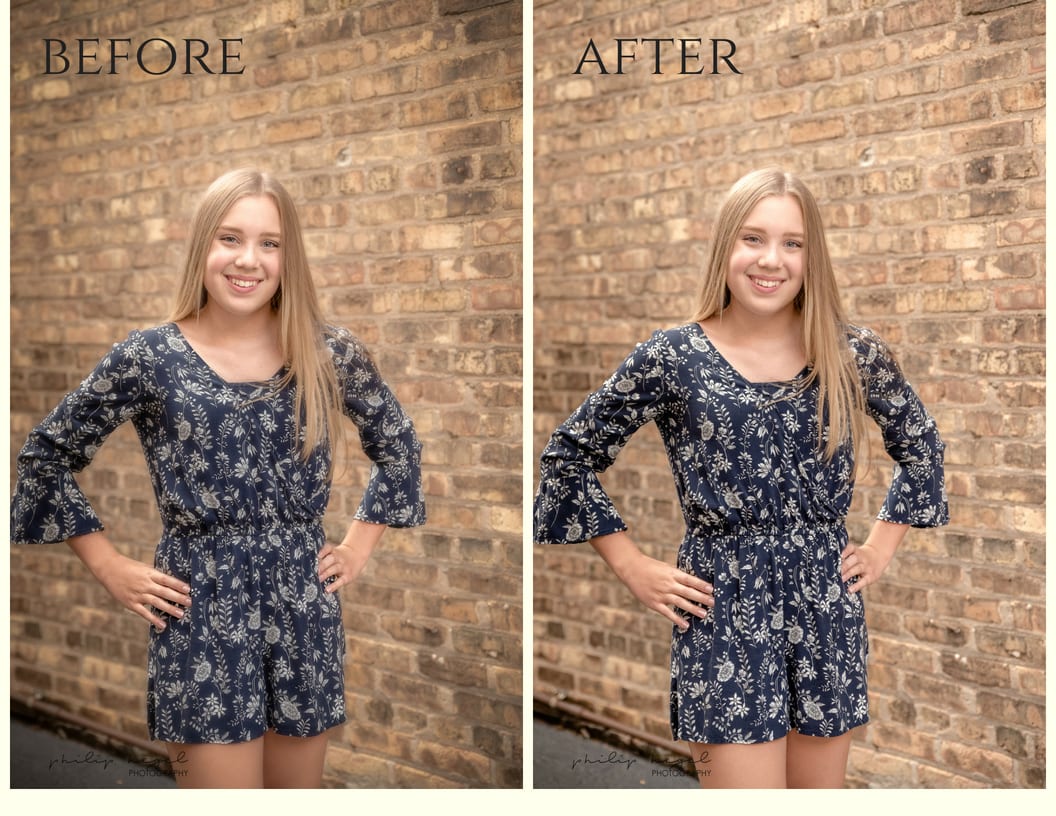
 Once you think you have the amount that is good click ok. Your photo is still gray, but now you will go to your layers panel on the right side of the screen and under your blend mode drop down menu (probably says “Normal” for the default) you will choose “Overlay” instead. (Not sure how to use blending modes?? Learn how here!) Now your image comes back in full color and should be sharper! Toggle that layer on and off a few times to see the difference in before and after. If it is too much or too little for what you need, delete that layer and just start the three step process over again, but change your pixel radius higher or lower (more or less sharpening) to suit your needs.
Â
To Rescue A “Slightly:” OOF Photo
Now if you need to use this function to rescue a photo that? might have missed focus, just do the same steps as above, but you are going to pick a higher pixel radius this time (think maybe 4 to 8ish), and you are going to use a black layer mask to mask the effect out of the entire photo, and then use your white paint brush to paint the effect in to the local spot where you want it. If you need to sharpen an eye that maybe was slightly out of focus I will apply the edit only to that eye and leave it masked out everywhere else, as the example photo. If you need to apply it to an entire face,? do it on the eyes, the eyebrows, the tip of the nose, the cheeks, and the lips and that is all. If you need to sharpen more stuff to rescue the photo you might just want to consider a different photo because this method HELPS, but it does not perfectly correct things you did wrong in the first place. Remember: like of all forms of sharpening this can add “noise” to your photo so use it sparingly. Just play around with it until you are comfortable with it.
Â
Watch me below as I try out the high pass filter to sharpen my own image!
Â
Learn More About Philip Hegel
I am a full time photographer specializing in real estate/interiors and families/newborns. I live in the Northwest Chicago Suburbs with my wife (and favorite model) Apollonia, and our dog, Callie.
Check out more of Philip’s fantastic work and follow him here!
Â