


Have you ever taken a photo and exposed for the people in the photograph? I’m sure you have! They come out well exposed, but the sky…well, that looks completely white or completely overexposed. That’s normal. It is extremely difficult to expose for both the sky and your subjects, but there is a way to add back that beautiful sky to your photo in Photoshop Keep on reading and I’ll show you step by step how to easily add a sky overlay.
Find a picture of a well exposed sky
You can do this in a number of ways. There are many places where you can purchase sky overlays. OR even, start your own collection. When you are out and about shooting, take a photo of the sky. Save these in a folder for you to use at a later time.
RELATED PRODUCT: COZY CLICKS CLOUDS AND RAINBOWS OVERLAYS
Bring your photo into Photoshop along with the sky you want to use
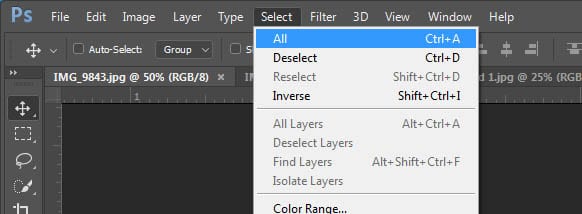
From here, make sure the sky photo is selected. At the top menu bar choose> Select and then >All from the drop down menu. Then select the choice Edit on the top menu bar and copy from the drop down menu.
Now go back to your original photo (the one you want to add the sky to)
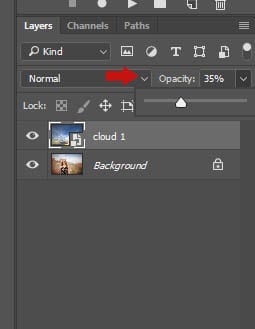
Select edit again from the top menu and from the drop down select paste. Now your sky is over your original picture. With your sky photo layer selected adjust the opacity down (I always move it down to where I think it looks good, then go just a little less to make sure it won’t look fake)
Use the Gradient Tool
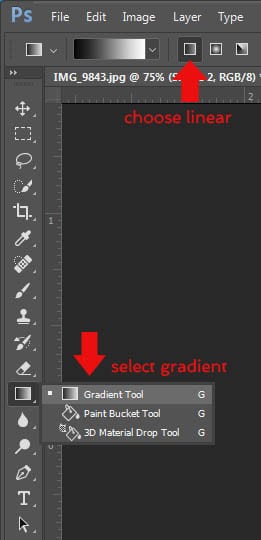
From the left side tool bar, select your gradient tool (look at the example to your right). You want to make sure that linear gradient is selected from the top menu. Click that gradient somewhere near the face of your subject and drag it up. (you may have to play around with this step a few times to get the look you want) In a natural skyline, the sky is lighter (even white) at the horizon, so there should be a gradually gradient from lighter to darker.
Brush any remaining sky off your subject
If you still see part of the sky on your subject, just grab a black brush and brush off on the layer mask of the sky layer.
And there you go! A natural sky in your photo. To see these steps in action (and see a few more cool tricks) watch the short video tutorial below.
Hope you learned a little something! Leave a comment below and let me know how it worked for you! Have another way you add in a sky? Let us know! To see more Photoshop tricks click here!