

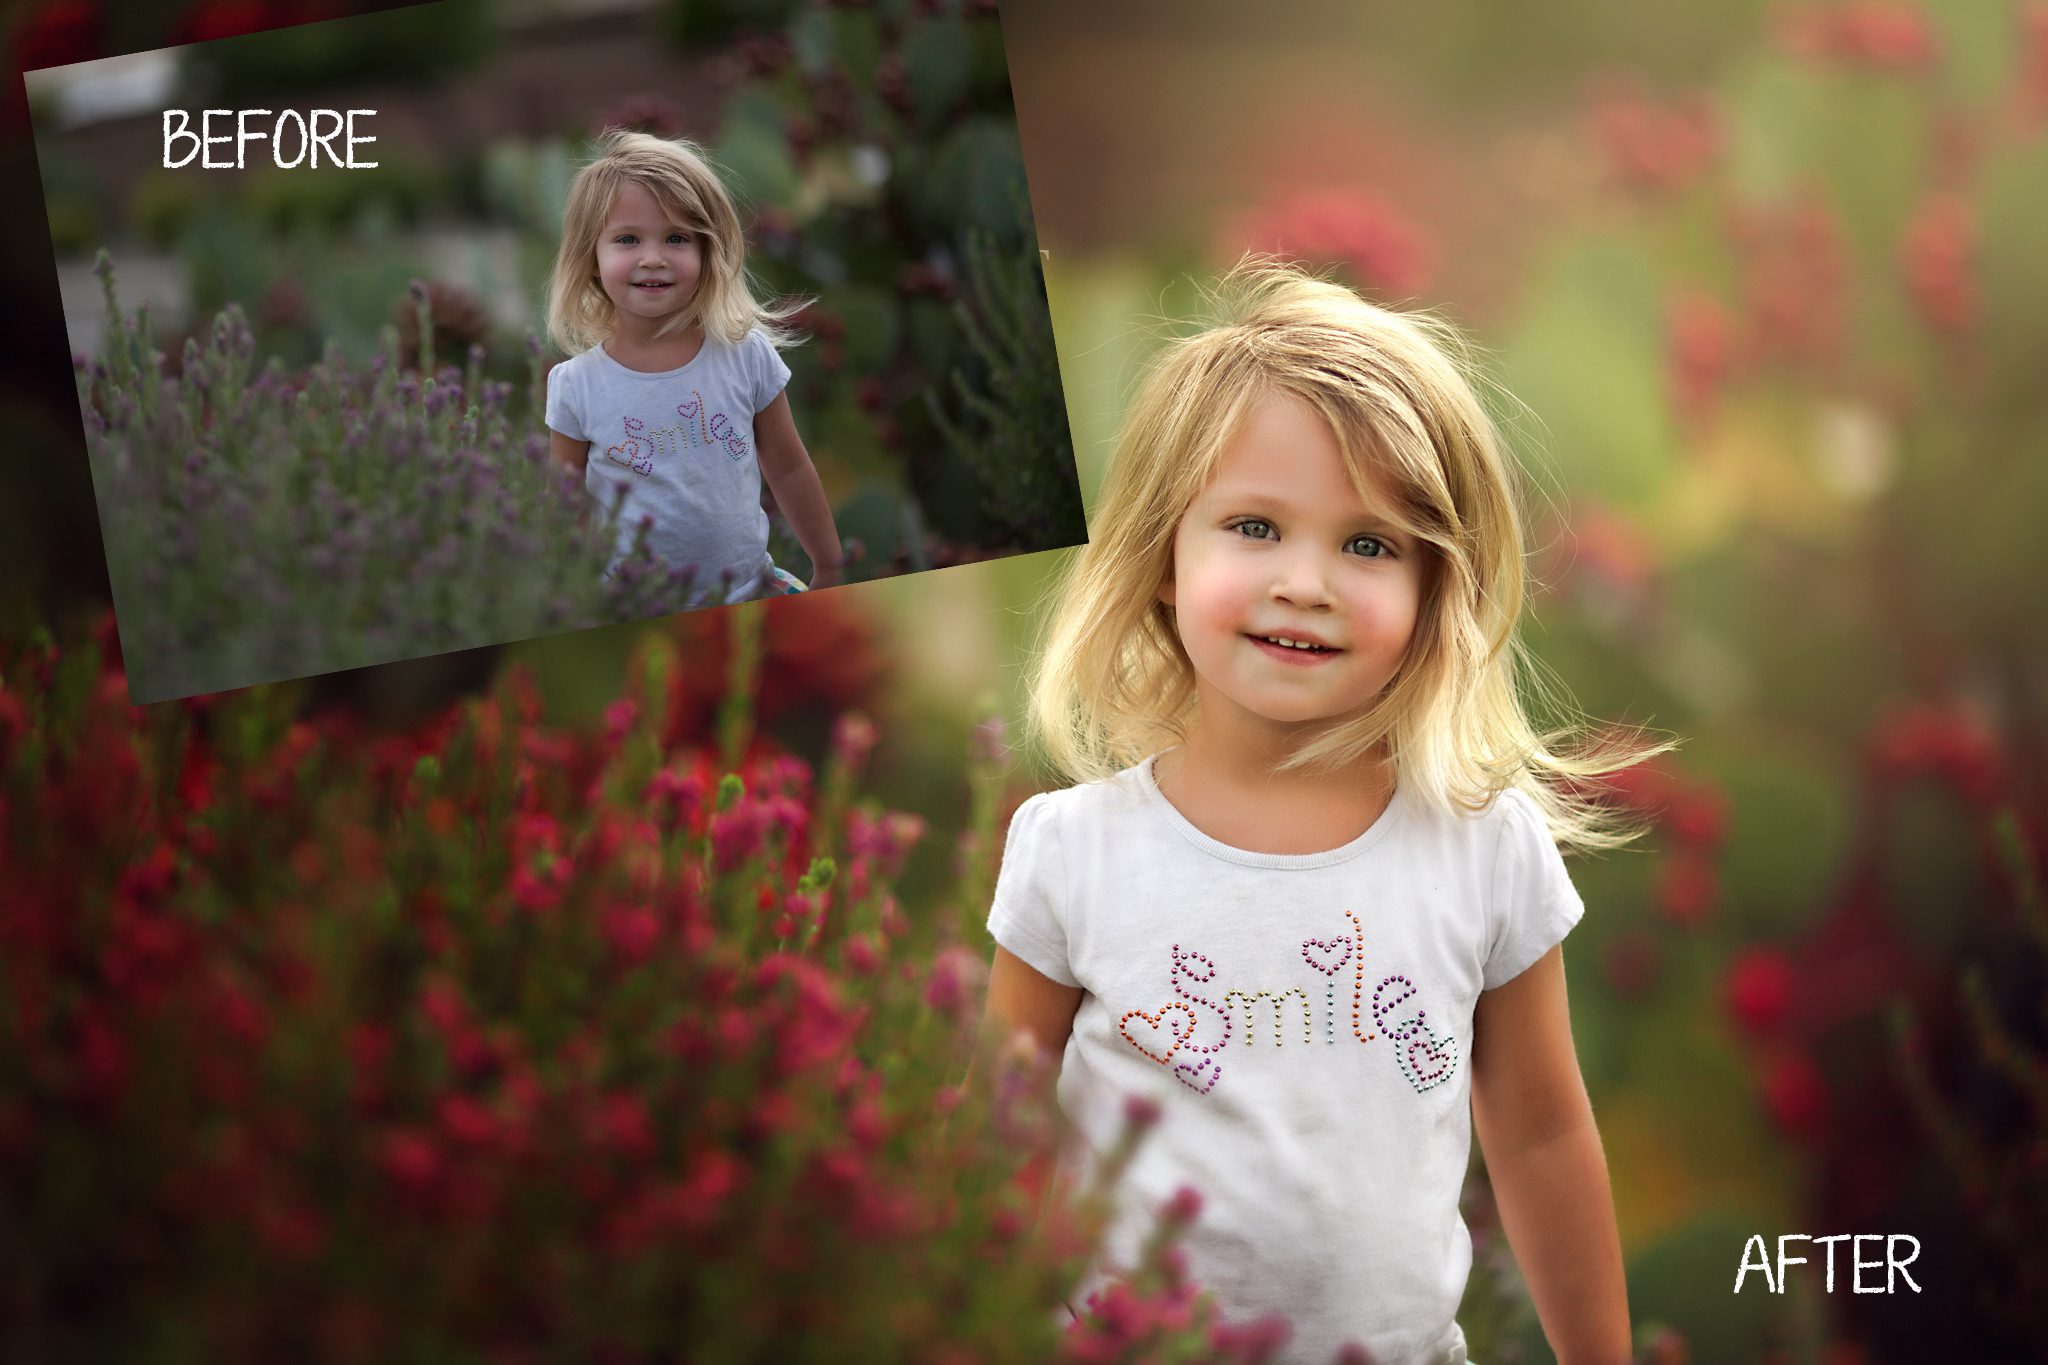
I am part of a group of very talented photographers who participate in a monthly blog circle. If you are not sure what that is, you can read my explanation from a previous circle here. For this month the theme was :before and after. I thought it would be fun to post a before and after of my editing process because I get many emails weekly from photographers wondering exactly what I do to edit my photos. I also haven’t shared a before and after since February when i shared my “Love is in the Air” balloon photos. This post will not be a step by step tutorial on how I got from the SOOC to the final image, it will however give some tips and tricks that I have learned to produce a bold and colorful image.
NO ACTIONS REQUIRED
A big reason that this is not a step by step tutorial is because this was edited quite a few months ago and honestly, I do not remember all the steps I took to get from point A to point B. That is because I do not use saved actions when processing an image. Each image for me is different and I use a different set of techniques to achieve a look I was hoping for. I do not use other people’s actions when processing so that I have total control over what happens in my photo. Learn as much as you can about Photoshop and apply it to your work.
DETAILS, DETAILS, DETAILS!
It is important to look at your composition and colors around you before you start taking photos. Think about what will look compositionaly well and work from there. Pay attention to your models clothing and what will look good with the environment Pay close attention to details. Notice the details of what is around you and then step back. If everything is in place you can start snapping.
UNDERSTAND THE COLOR WHEEL
This is extremely important both while shooting and during processing. Know which colors complement each other. Pay attention to color around you. Once you look back at your RAW files decide what colors you really want to stand out in the image- or which colors you want to change. For this particular image here, I saw that I had a more purpley flower in the foreground as opposed to a redder flower in the background. I know that green and red complement each other so I decided to make all the flowers a bright bold red to complement all of the green that surrounded her. Now when playing around with color, Photoshop has many tools you can choose from to really make things pop: levels, curves, color balance, selective color and more. Play around with them and see what you can learn!
Want to see more fun before and after photos?? Check out the very talented Susy Martinez to see her take on this theme!
gorgeous before and after. you brought out the beauty in this shot!
Wow!! Great before & after. She’s a doll!
I love how much color you brought into this children’s portrait!
Wow. This before and after is stunning. The light and the colour is perfect. Wonderful job.
i love the edits on this photo session!
Thank you for sharing your before and after. I love seeing how a photographer interprets a photos.
LOVE this edit. Would love to be able to make such beautiful art. WOW
I really like the deep colors in this edit! Well done!
Love the deep colors in this edit! Well done!
So cool that you’re sharing your technique with people!! Your shots are great!
I love the before and after shots. You show true talent in your finished products! Details are key and you prove to provide that here!
Such an amazing before and after transformation.
You did an amazing job with your post-processing of this shot!! So beautiful!
What a beautiful edit! Ahwatukee looks so gorgeous! How fun for a photographer to have such an amazing backdrop.
absolutely love the before and after of this image!
Beautiful edit- wonderful child photography!
Great tips and a fantastic example! Lovely editing!
Absolutely gorgeous work! I love how an edit can take a great shot and make it a WOW shot!