

Have you ever looked at your photo while you were editing and just thought, blah!?
Not that it was bad, but just a bit boring. You wanted it to have more of a pop to it! I know just the thing that might help.
Blending modes in Photoshop might be what you were looking for to add that punch and creativity to your images! Not sure what they are or how to use them? Watch or read below to learn and then try it out on your own!
What Are Blending Modes?
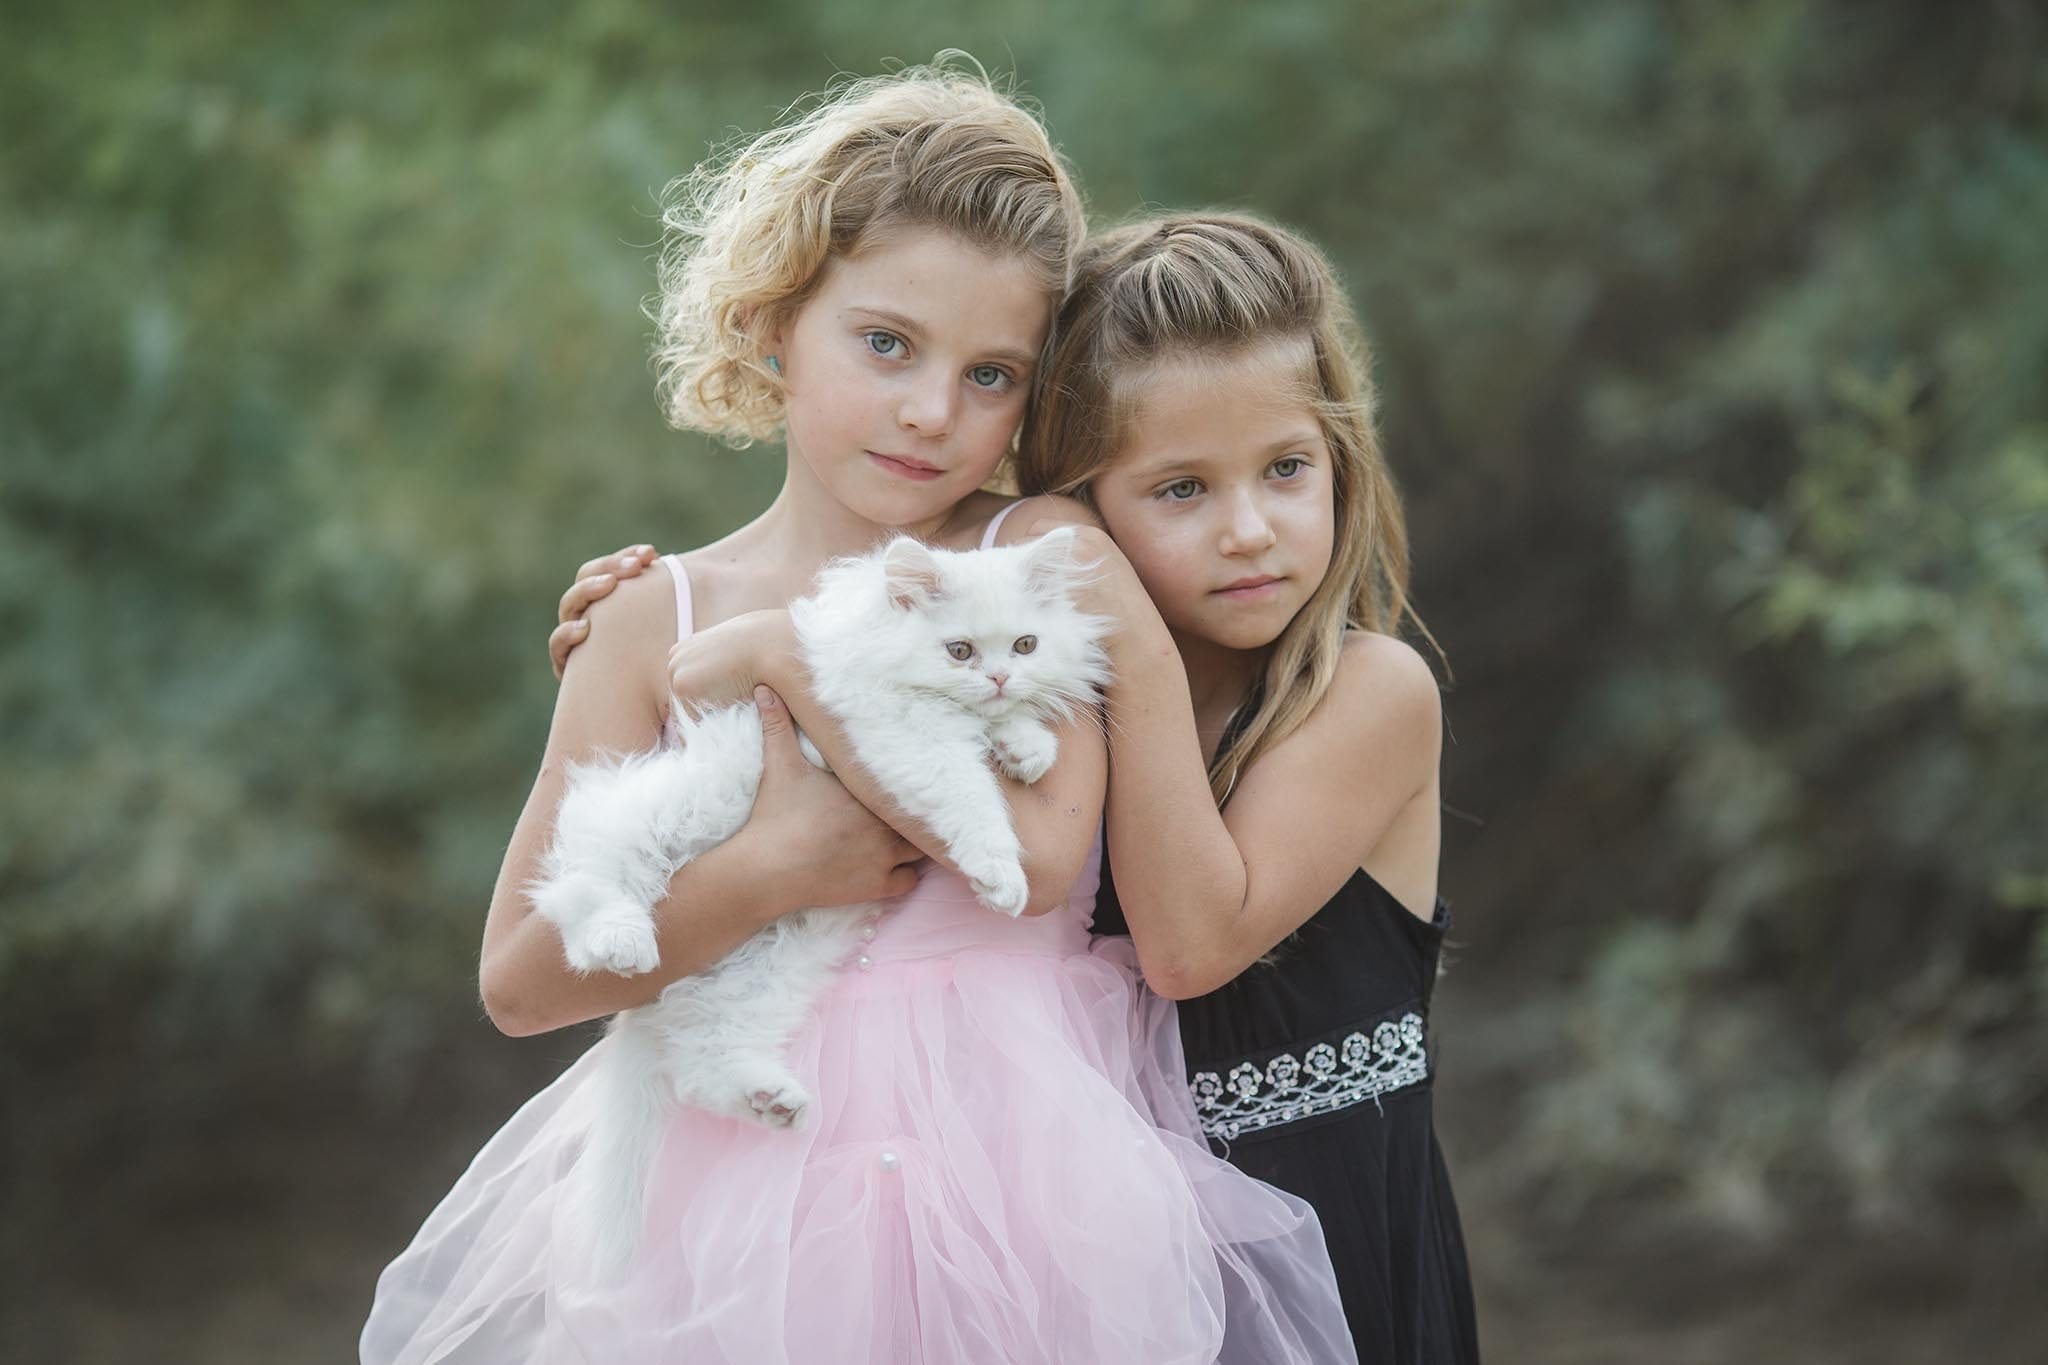
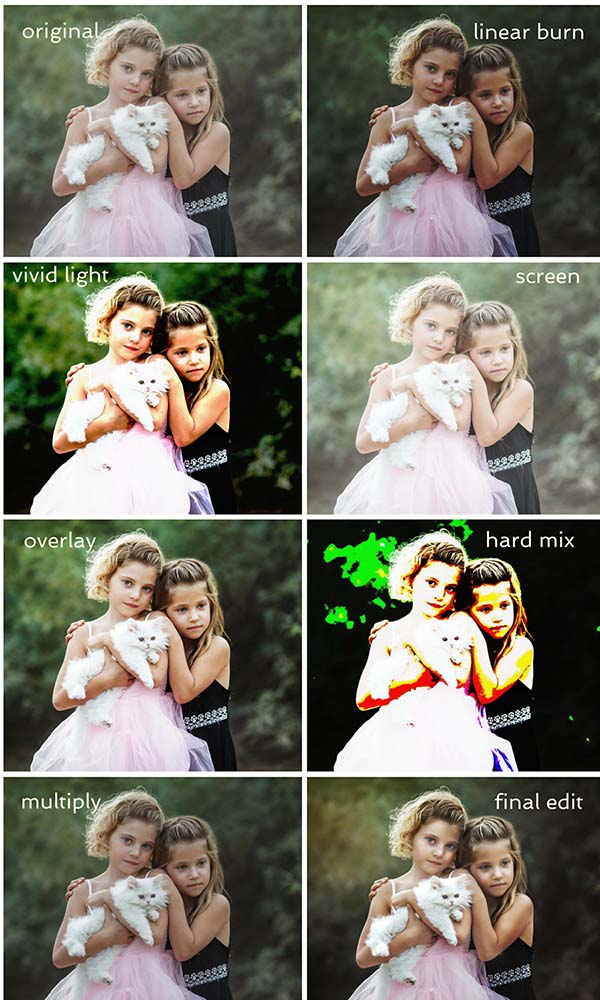
To put it really simply, they will change the way the colors in your image look in Photoshop. Right below is my original image. Keep reading to learn how to create many different looks of this same image in just a matter of seconds!
Most Common Modes
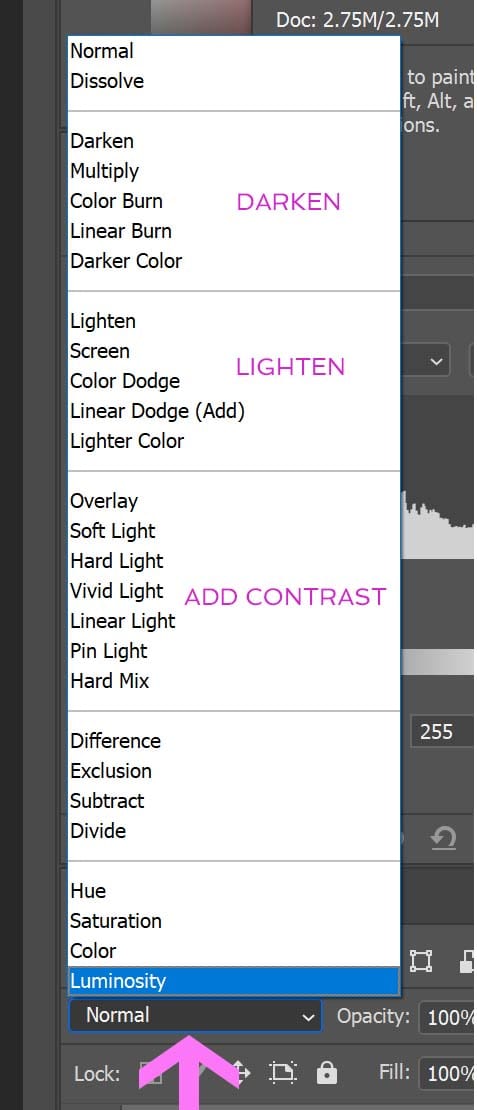
The blending modes are broken into categories. The more common ones that are used are the ones that will lighten the colors, that will darken the colors and will add contrast to the colors. Take a look below to see the different groups. Each one will make your photo look slightly different.
How To Apply Them
You can choose to apply blending modes to your images as a whole OR certain parts of your image to really pinpoint the look you are going for. To apply them either duplicate your background layer, OR you can choose an adjustment layer like curves or levels (it doesn’t really matter because you won’t be altering those adjustments). With that level selected chose blending modes and select the one you’d like. Play around with the different modes to see the difference it makes on your photo! (See that pink arrow, that’s where you change them!)
RELATED PODCAST EPISODE
Get Detailed
Take blending modes one step farther and target only the areas you want affected. Complete the same steps as above, but this time add a layer mask and invert it. Brush on only the area you want that blending mode to show through! ( Watch me above in the video to see in more detail!)
Here are just a few of the different blending modes applied on that original image. See the dramatic difference!
And there you have it! Now’s your chance to get really creative! Try different modes on your photos and see the difference it makes!

I get a little lonely back here behind your screen and I always LOVE to know if you are reading and what you think!? Leave me a quick comment below to let me know if this helped you!

This was my final image. I decided to use the blending mode “linear burn” because I just loved the deep rich colors and moodiness it gave the photo. I wanted it to look edgy and dramatic. In addition to the blending mode change, I also used the Cozy Clicks Perfect Portrait Retouching Photoshop Actions on the subjects on just the above image.
RELATED ARTICLE: 3 WAYS TO GET YOUR COLORS TO POP IN PHOTOSHOP!
very lucid information on blending modes. Thanks
This was VERY helpful I am a newbie and this is a perfect amount of information, made simple enough to follow.
Happy to help Colleen!
Yes this will help, thank you so much
You are so welcome Lou!!
This will absolutely be helpful! Thank you so much!
~ Leah
You got it Leah! Happy to help? Emily
I had totally forgotten about blending modes! Back in the day I would use soft light and screen quite a bit to lighten my photos. I think I stopped using them after I purchased a set of actions and use those for most of my editing now. Thanks for reminding me about them, they really are a great quick fix!
Great quick video i’m trying this tomorrow and will let uou know how it goes.
Awesome Adriana!! Hope it helps??
Thanks for sharing this “simple trick” with us. Very useful.
Great video… really like the topic and your recommendations.
Thanks Don! Love your feedback ?
S Dowell: wonderful added functions that are so easy to use and make such a difference. most of all, your quick tutorials have better help me understand layers which is a biggie for me. I would just give up in the past.
So happy to help Sharon!??
Thank you so much for all your tutorials. They are very informative and appreciated.
You’re so welcome Peg!
quick and very informative! I love how you can start off for a painterly look by using the blend more first and then enhancing the effect with dodge / burn, etc.!
I know right! You can get so many different looks;)
Thank you so much Emily ?? Your tutorials are amazing xx loads of creative love from South Africa ??
You got it Chanel!
This was great Emily! I love these tutorials. You are such a great teacher!
Glad it was helpful Tanya! And thank you;)
this was great! thank you
You are welcome Judi!
I am going to have to try this, thank for the tips!
You got it Debbie!
Great tutorial! Thank you!